
Start-to-finish CSV Order Status Changer demo
PremiumPrepare, validate, apply, and verify one safe WooCommerce order-status CSV from beginning to end.
Reviewed 2026-08-17
This walkthrough takes one CSV through the complete safety workflow. It validates the requested changes first, applies the same file only after review, and preserves a downloadable row-by-row result.
What you will build
- A UTF-8 CSV with
order_id,status, and optionalnotifycolumns. - A validation-only preview that changes no orders.
- A foreground import whose progress remains visible.
- A final result showing changed, skipped, and invalid rows separately.
- A background run and controlled recovery path for larger files.
1. Install and open the importer
- Install and activate WooCommerce.
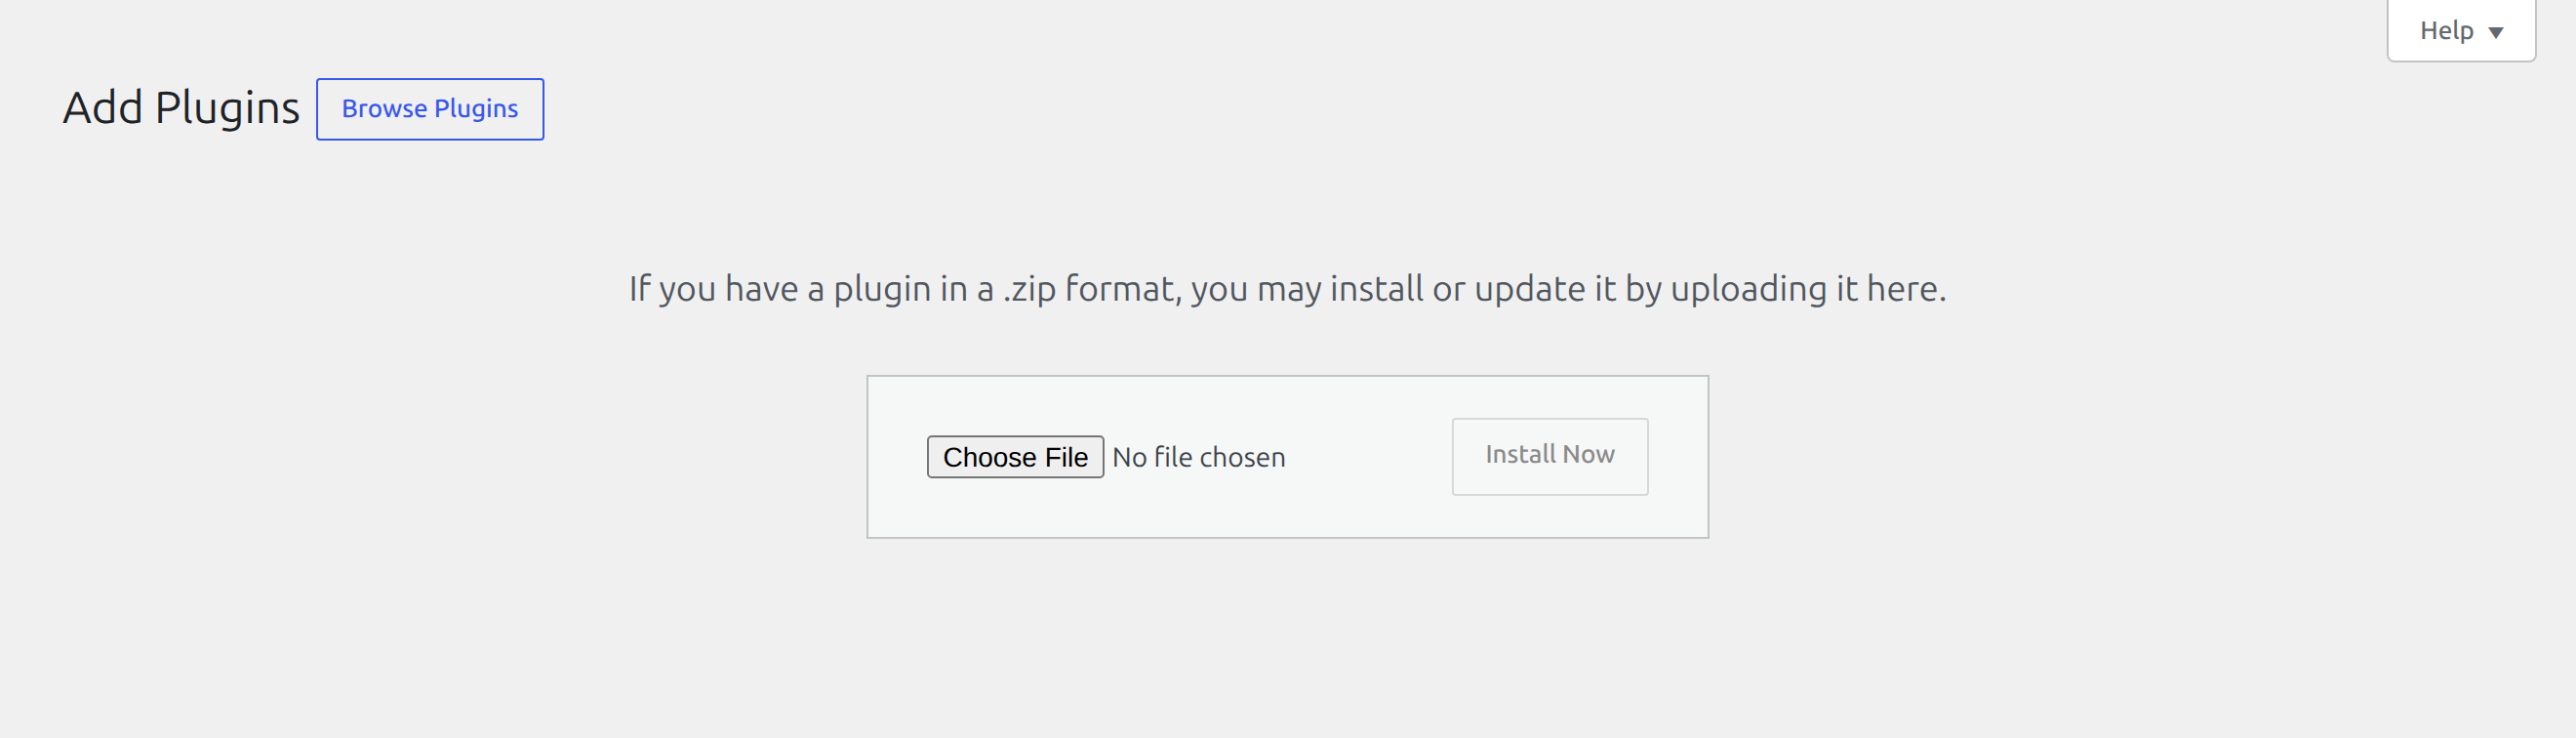
- Go to Plugins → Add Plugin → Upload Plugin.
- Upload and activate Laqi CSV Order Status Changer.
- Open WooCommerce → CSV Order Status Changer.
Use a staging store for the first run and take a database backup before a large production update.

2. Prepare a small CSV
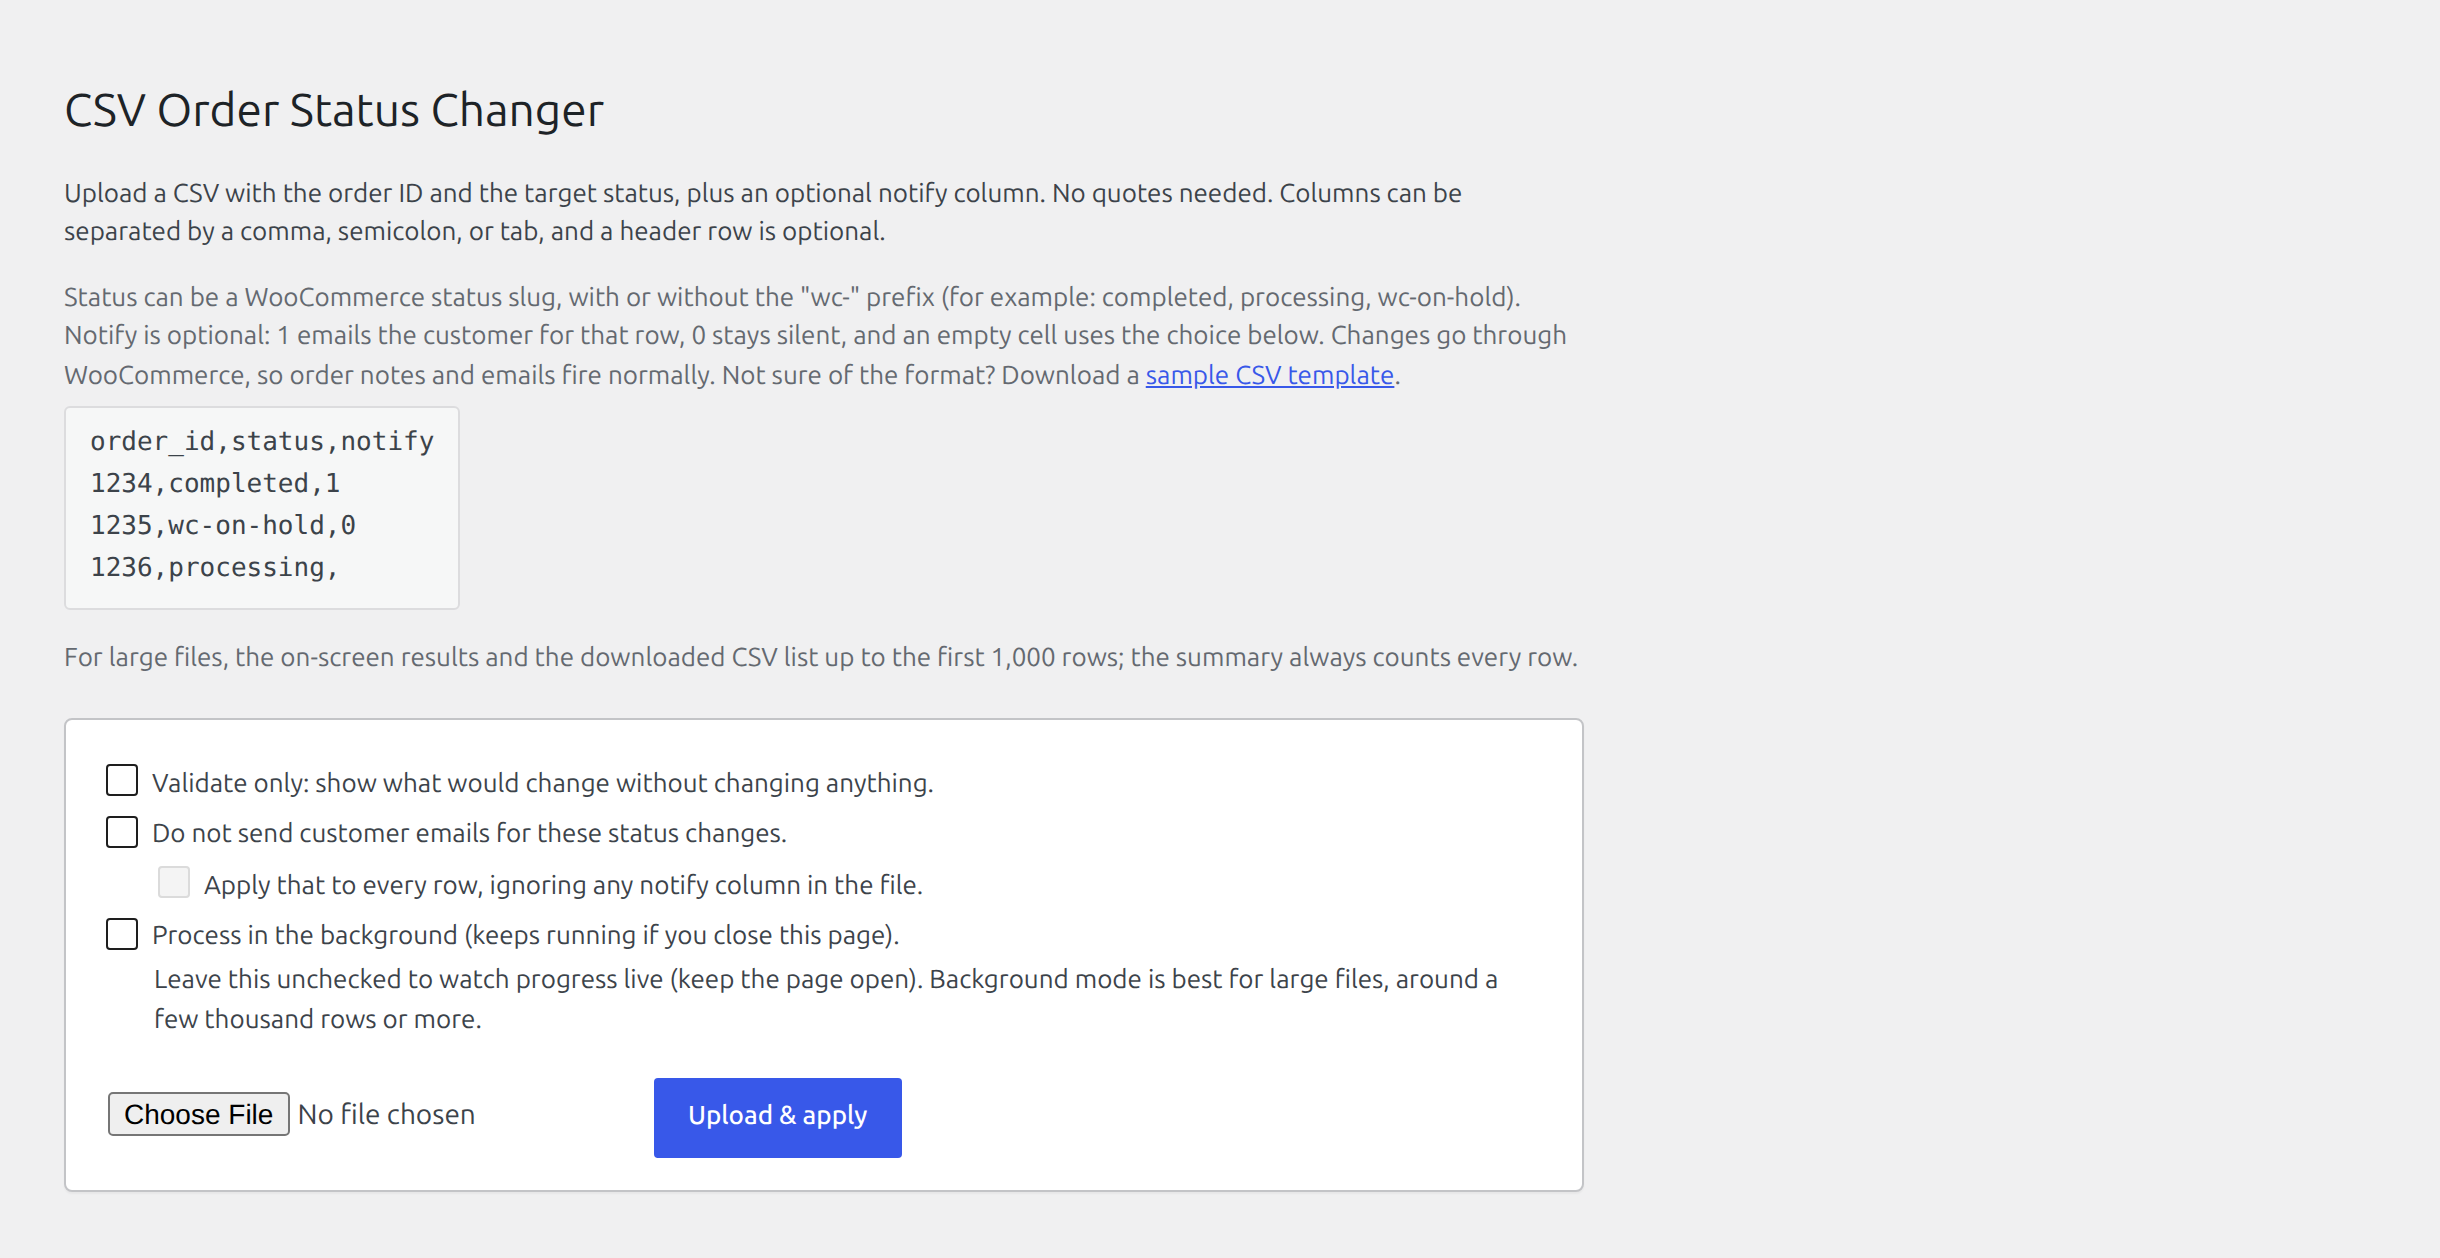
Download the sample template from the importer, then create status-demo.csv:
order_id,status,notify
114,completed,0
115,completed,0
157,on-hold,0
117,processing,0
Replace those example IDs with real orders from your test store. Status values may
use WooCommerce slugs with or without the wc- prefix. Save the file as UTF-8 CSV.
3. Validate without changing orders
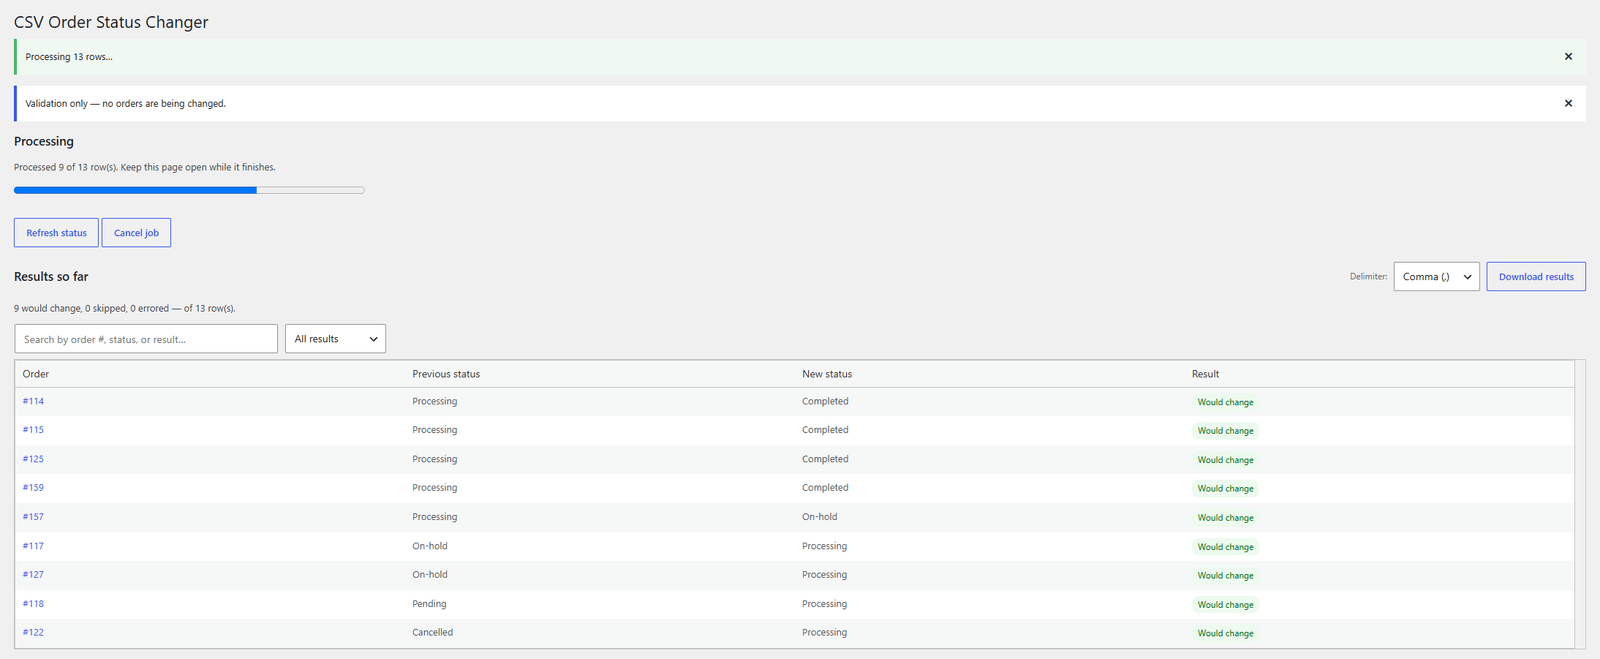
- Select Validate only: show what would change without changing anything.
- Select
status-demo.csv. - Choose Upload & apply.
Despite the button wording, validation-only mode performs no status changes. Review the previous status, requested new status, and result for every row.
4. Decide how notifications should work
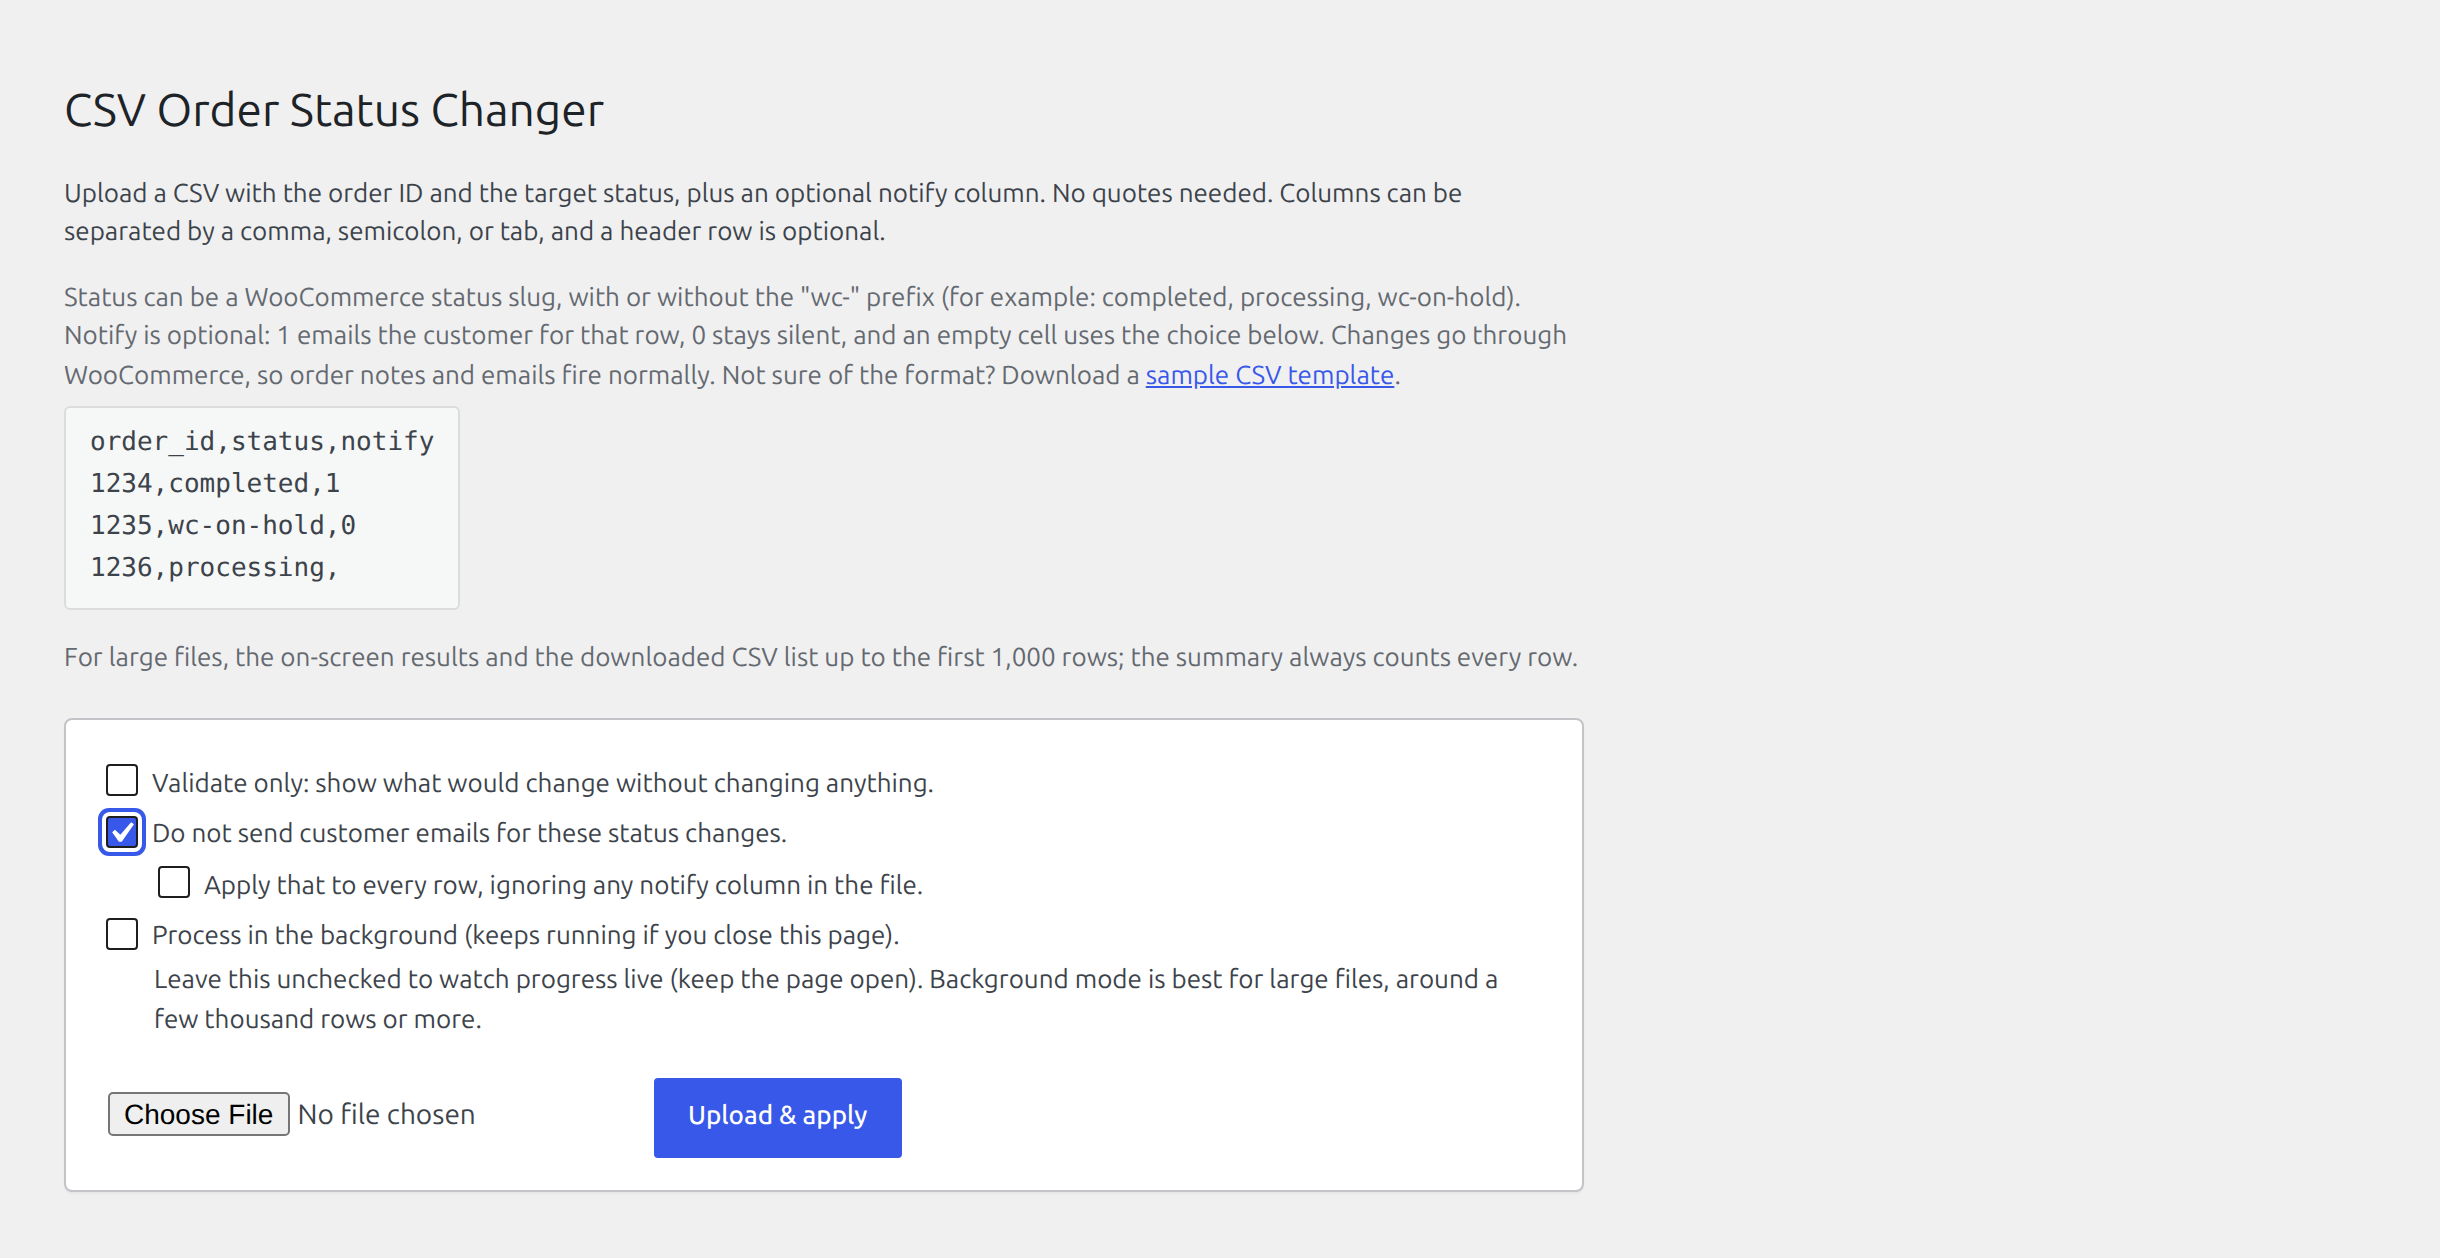
The notify value controls each row: 1 sends the normal customer notification,
0 keeps that row silent, and an empty cell uses the screen-level choice. For a
controlled internal correction, use 0 as in this demo. Do not select a global
notification override unless every row should use the same behaviour.
5. Apply the reviewed file
Return to the upload screen, clear Validate only, select the unchanged CSV, and choose Upload & apply. Leave Process in the background cleared for this small demo so progress remains visible. Do not close the page until processing completes.
6. Verify and keep the evidence
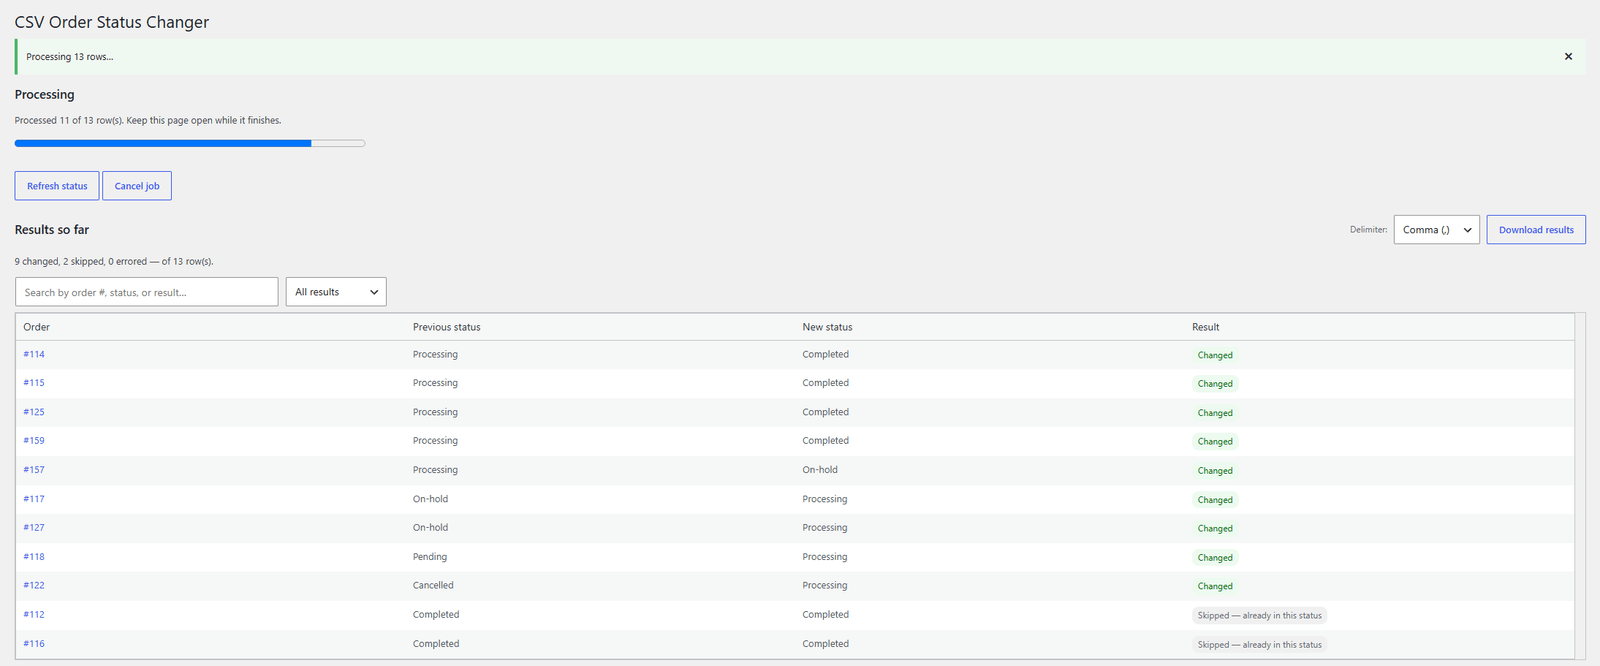
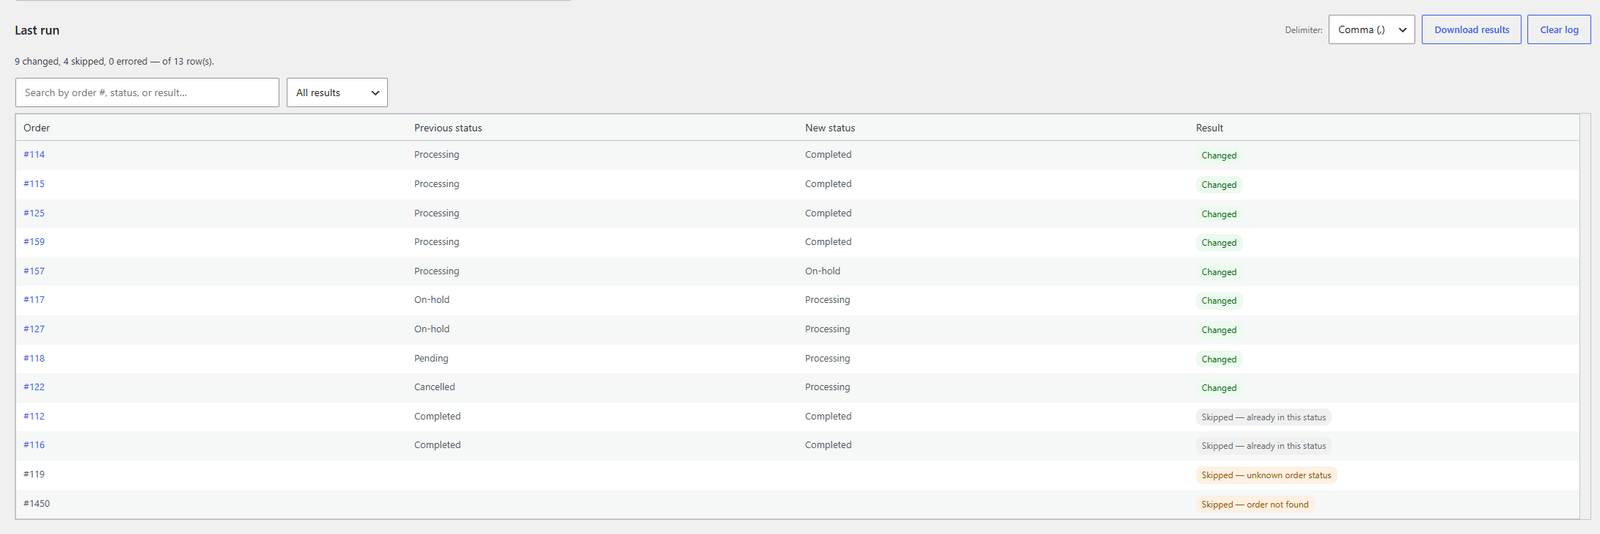
Confirm the summary counts and inspect each result:
- Changed means WooCommerce accepted the requested transition.
- Skipped - already in this status is harmless and idempotent.
- Missing orders and unknown statuses remain skipped or errored rather than guessed.
Open several changed orders and verify their status and order notes. Then choose Download results and retain that file with the exact input CSV.
7. Scale up only after the demo succeeds
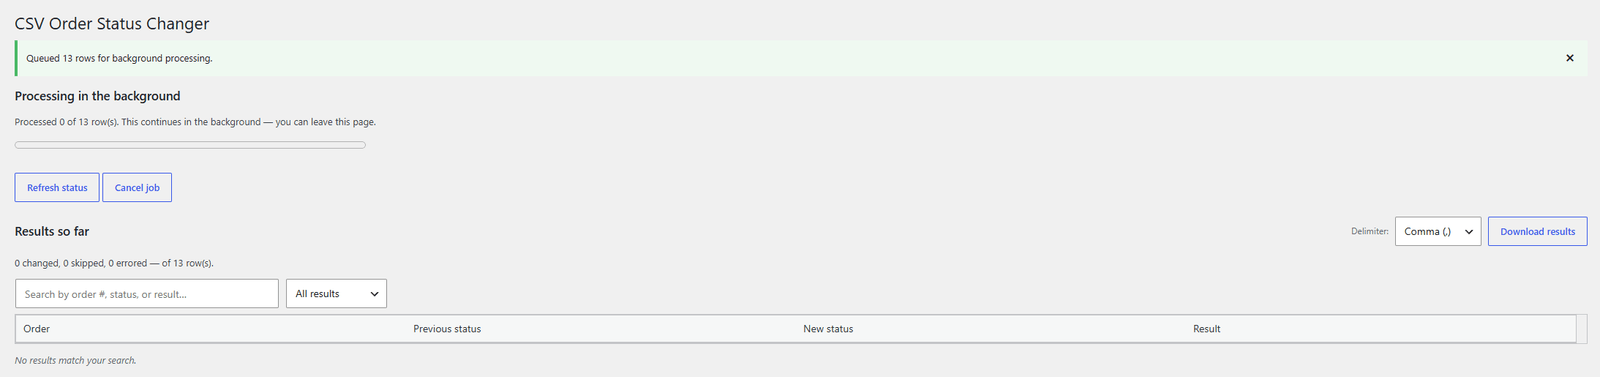
For larger files, split unrelated operational changes into separate imports and use background mode.
- Select Process in the background on the upload screen.
- Upload the already validated file.
- Leave WordPress to process it and return to Last run for progress and results.
8. Recover a genuinely stuck background job
Open Last run before retrying. If progress is still advancing, leave the job alone. If the screen identifies it as stuck, use the offered recovery control once, then monitor the same job rather than uploading a duplicate file.
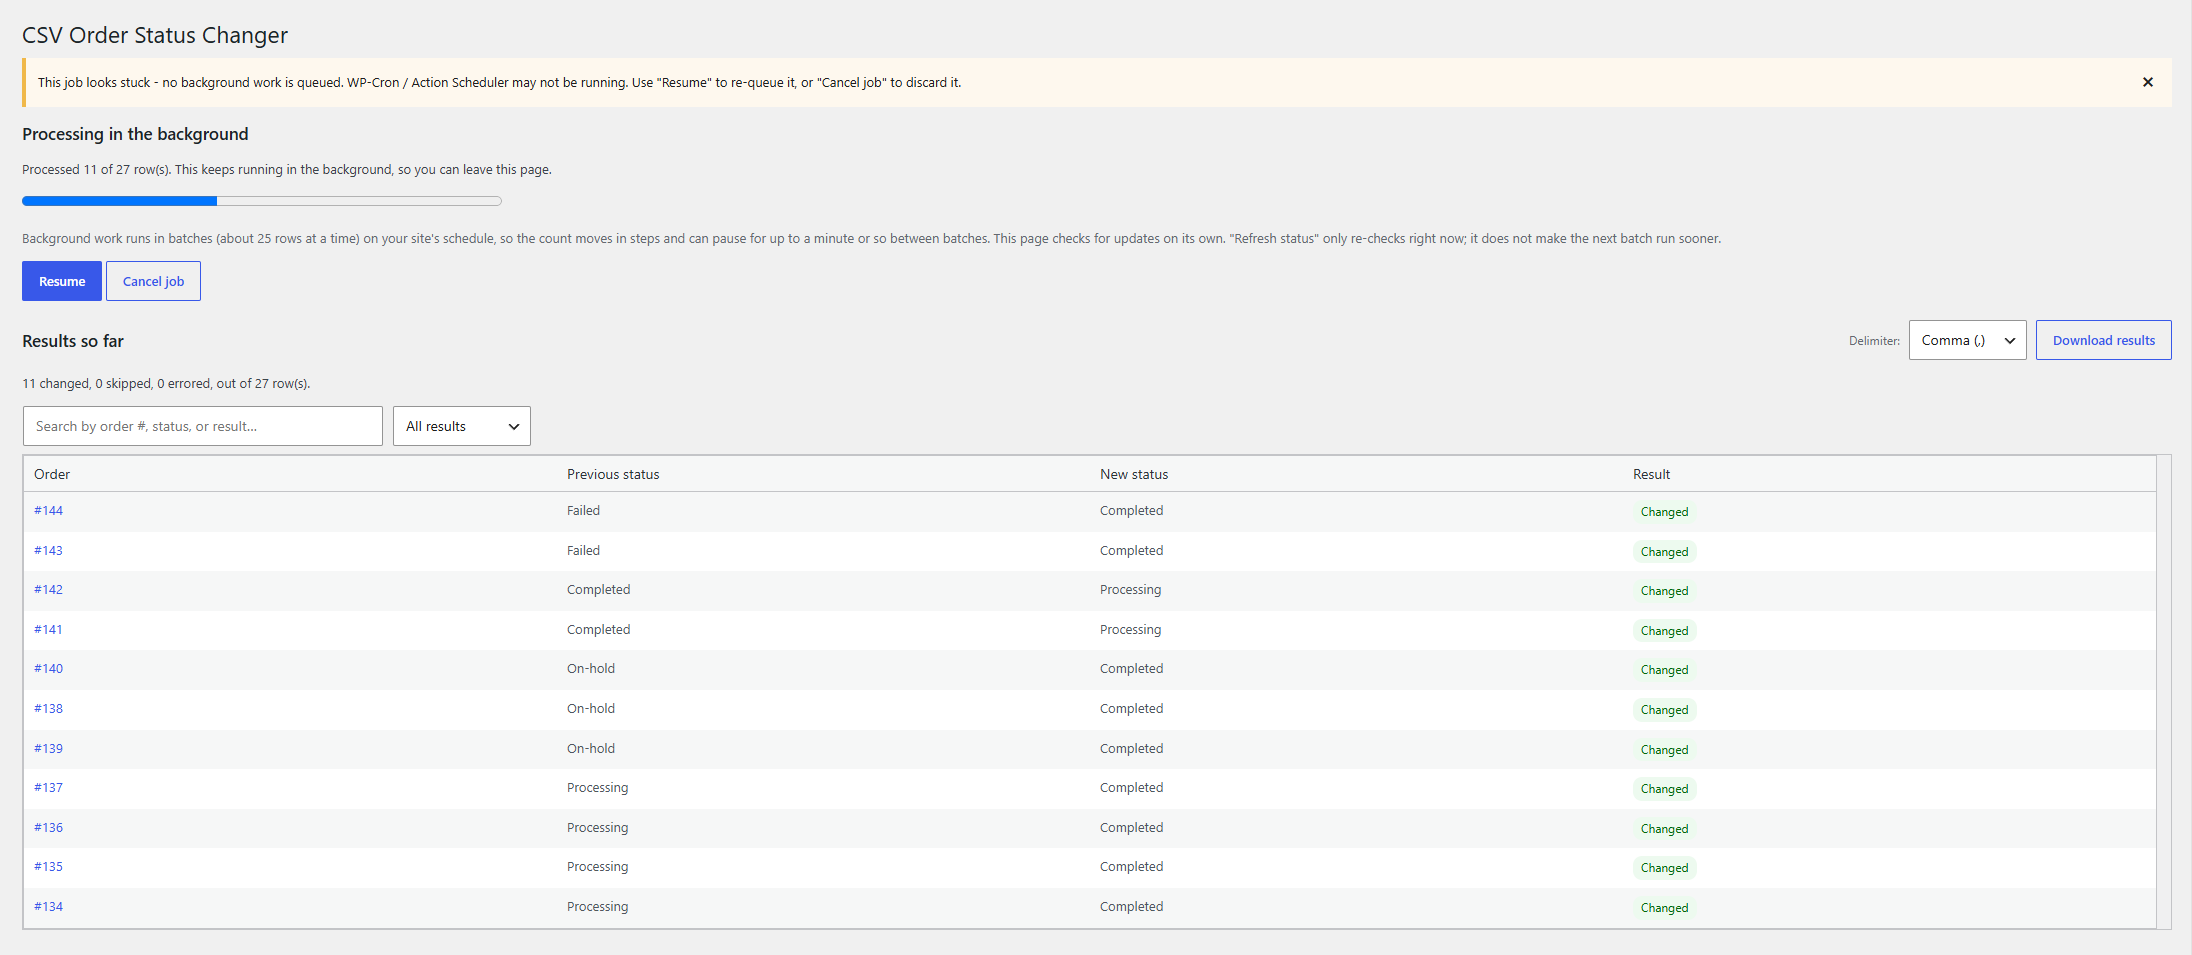
Download the completed results afterward. Re-running an already successful row is safe because an order already in the target status is skipped, but overlapping jobs still make operational review unnecessarily difficult.